Why is my LED replacement for a flurescent tube not working?

r_c

Joined
19 Jun 2016
Messages
271
Reaction score
5
Country
United Kingdom
I am not an electrician, so please go easy on my lack of knowledge.

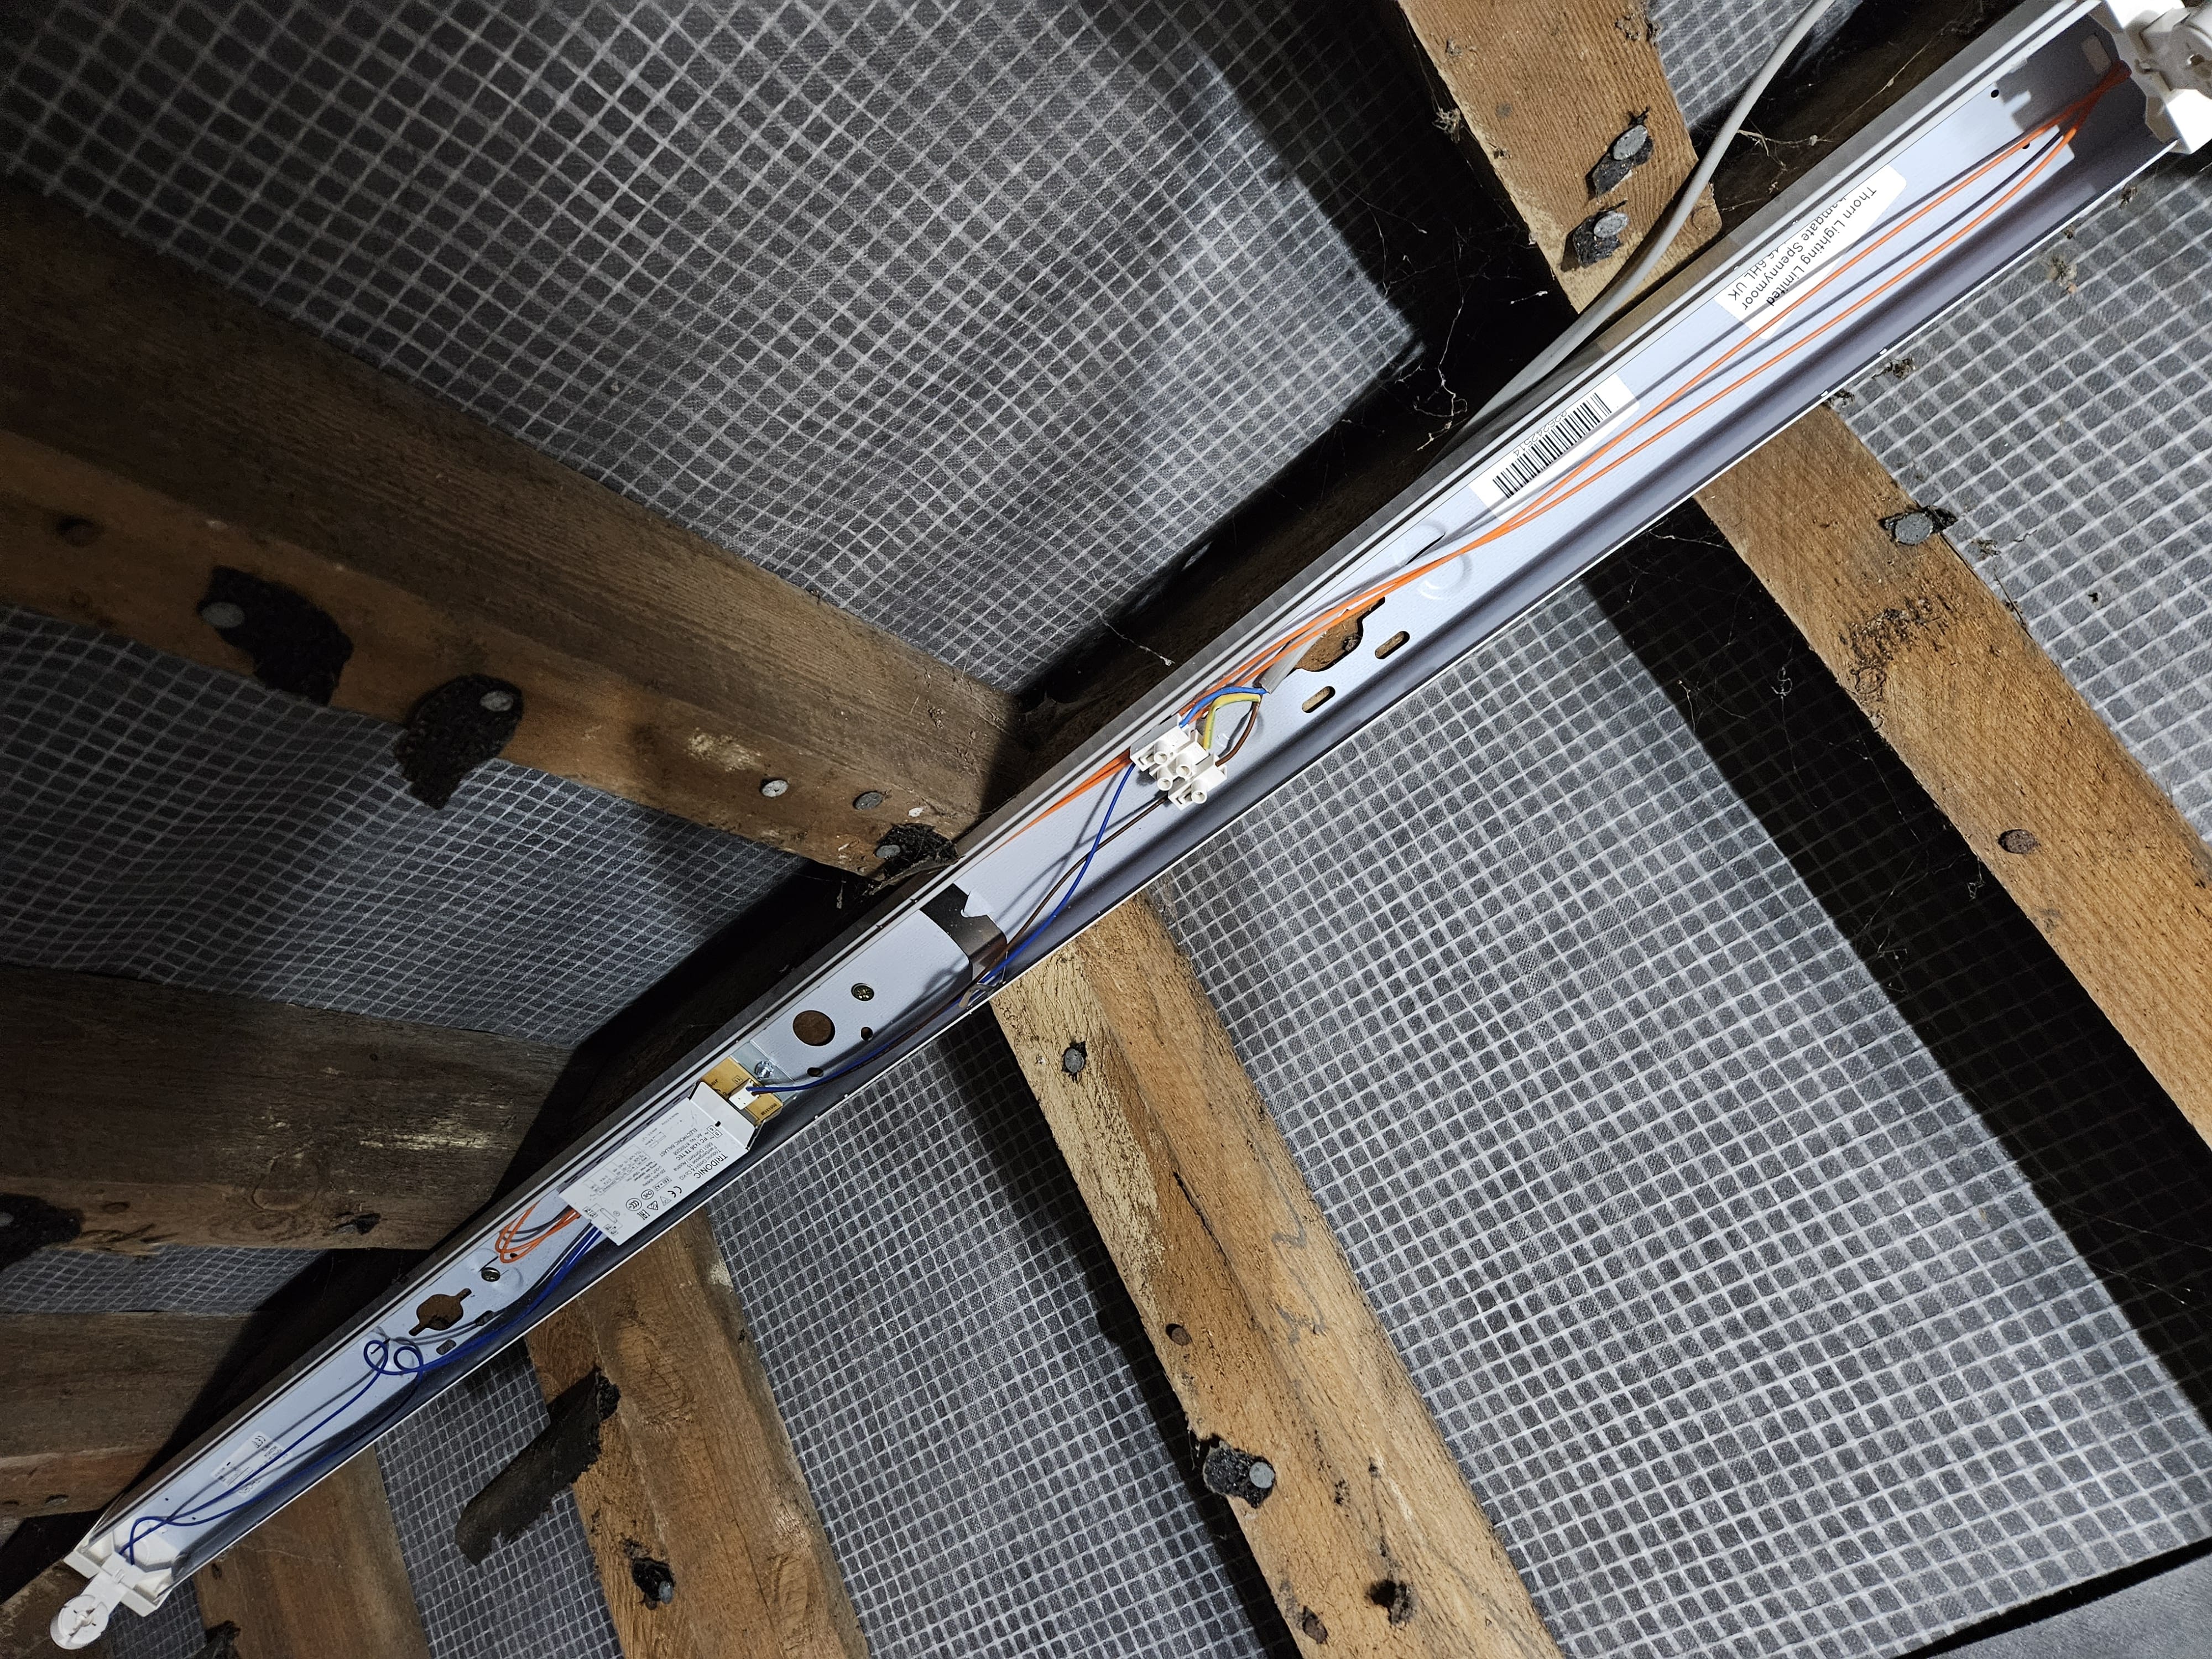
I have replaced an existing fluorescent tube (that had begun flashing) with an LED tube. The new LED tube came with a starter, but I could not find one in the old light box.

The new LED tube comes on for a second or two, and then goes off.

What step have I missed?

Video of light in action
The LED I bought: https://www.amazon.co.uk/dp/B0C8TQ9HX

 
Some LED tubes need their own starters to work. Having said that I bought two direct replacement LED tubes from B&Q and they just plugged straight in and worked with no other modifications. If the old flouresecent tube was not working it could be the ballast and as far as I can see the ballast is needed to make the direct replacement LED tubes work. At least with the two that I replaced I did not remove the ballast or anything else, just plugged the tubes in and they worked.
 
  • Thanks
Reactions: r_c
That Tridonic box is an electrical starter gizmo. You probably need to wire that out, in some way.
Hopefully the instructions tell you about how to do that!?
 
  • Thanks
Reactions: r_c
That Tridonic box is an electrical starter gizmo. You probably need to wire that out, in some way.
Hopefully the instructions tell you about how to do that!?
In your opinion, do you think that my existing light is wired like the circuit below in pink? (This is a screenshot from the Amazon product page.)

 
Last edited:
Neither, I think, you have an electronic ballast and the LED tube is designed to be used with a magnetic ballast.

The fluorescent is wired like this
LED before converter.png
with a wire wound ballast, we need to convert to this
LED tube wiring 2.png
for it to work with most LED tube replacements, the fuse can replace the starter, but unless both ends wired in series, putting the tube in the wrong way around is a short circuit, wired as shown it does not matter which way around the LED tube is put in.

1739723924266.png
 
  • Thanks
Reactions: r_c
I suspect you need to disconnect all the wires. (Better make a note or mark on which colours went where.)

Then connect the orange wires directly up to the supply cable. And supply cable only to that.
It will then look like the top diagram.

Earth to metal work
 
Shoving LED 'tubes' into places where fluorescents were intended to go is guaranteed to be a pile of expensive time consuming problems.
With respect, as a generalisation, that's nonsense, provide that one knows what one's doing (or is instructed what to do). I've done it countless times, very quickly, and have never had any problems.
 
With respect, as a generalisation, that's nonsense, provide that one knows what one's doing (or is instructed what to do). I've done it countless times, very quickly, and have never had any problems.
It entirely depends on the fitting and which tube is being installed.
 
It entirely depends on the fitting and which tube is being installed.
Yes - but, as I said, if one understands that, and acts appropriately, it's neither time-consuming nor a problem.

My main personal problem with "LED battens" is that they (at least, none I've seen) do not have replaceable tubes - and I don't really like the concept of 'throwaway light fittings of any type :)
 
Last edited:
You need to bypass that ballast. The instructions will tell you how, but if you are unsure post a copy of them here and somebody will try to talk you through it.
 
Yes - but, as I said, if one understands that, and acts appropriately, it's neither time-consuming nor a problem.

My main personal problem with "LED battens" is that they (at least, none I've seen) do not have replaceable tubes - and I don't really like the concept of 'throwaway light fittings of any type :)
Like it or not, that's the way it's going. Still better than all that mercury and phosphor to get rid of or have break in your kitchen.
 
Like it or not, that's the way it's going.
Sadly, that's true, but it's totally unnecessary. There's absolutely no reason why changing the light-emitting component requires that the replacement is not user-replaceable, just as light bulbs/lamps/tubes always have been.
Still better than all that mercury and phosphor to get rid of or have break in your kitchen.
There's no mercury or phosphorus in LEDs, whether they are replaceable or not (but they do contain some materials of environmental concern, like lead and arsenic).
 
Sadly, that's true, but it's totally unnecessary. There's absolutely no reason why changing the light-emitting component requires that the replacement is not user-replaceable, just as light bulbs/lamps/tubes always have been.

There's no mercury or phosphorus in LEDs, whether they are replaceable or not (but they do contain some materials of environmental concern, like lead and arsenic).
I know that, but there is in fluorescent tubes, that's why they have been banned.
 
provide that one knows what one's doing (or is instructed what to do).
The majority of people buying 'tubes' just expect them to work.
They have no understanding of what may or may not be contained in the fitting or the tube, or how to dismantle light fittings and rewire the internals in the multiple ways that the various tube affairs require.
 

DIYnot Local

Staff member

If you need to find a tradesperson to get your job done, please try our local search below, or if you are doing it yourself you can find suppliers local to you.

Select the supplier or trade you require, enter your location to begin your search.


Are you a trade or supplier? You can create your listing free at DIYnot Local

 
Back
Top