You are using an out of date browser. It may not display this or other websites correctly.
You should upgrade or use an alternative browser.
You should upgrade or use an alternative browser.
A Remote Phenomenon … SOLVED
- Thread starter Ray1000
- Start date
Sponsored Links
Is the liquid not out of the battery?
Sponsored Links
Thank you for the replies but I don’t think it’s any of these …
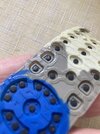
It’s too evenly spread and uniform from one end to the other to be from the batteries.
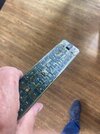
It started with exploring why an LG remote wasn’t working then I opened a Samsung one that was working and it was nearly as bad … yours is probably the same.
I’m thinking it’s some sort of reaction between the plastic components or to do with changing temperature

Just clean it off with meths and a soft toothbrush, leave to dry ,wash rubber mat in sink …
- Joined
- 11 Jan 2004
- Messages
- 43,969
- Reaction score
- 2,890
- Country

Never experienced this.
I’ve seen this before and assumed a drink had been spilled on it …eg coke or some other sticky drink …
This thread, has prompted me to pull the original remote, which came with my LG set apart, to take a look. I soon after buying the set, bought a second remote, a 'magic' one. The magic has been trouble free, but the less used one, the power button had failed, and some of the other buttons were less than responsive.
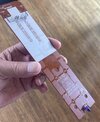
Under the power button was some sort of grease, the rest of the buttons it seems were just dirty. I'll try giving the rubber keypad a wash in soapy water, and the PCB, a clean with electronics contact cleaner.
To get them apart, without damage, is not easy - luckily, I had a podger to slip into the gap, to force it apart. The podger, like a blunt knife blade, from a set of watch and clock repair toolkit. Having done all that, all the buttons work much, much better.
Last edited:
Thank you for the link “Freddie” explaining about the silicone oil.
I had cleaned the LG & Samsung yesterday before making the post.
Removing the batteries on these two didn’t reveal any screws, it was a matter of carefully inserting a blade in to the seam between the two halves and prizing them apart enough to replace the blade with a bank card.
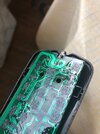
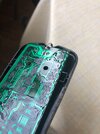
Once apart, I washed the back, front and rubber pad with soapy water and dabbed the oil from the PCB with a tissue.
For the non-tech people you need to be extra careful cleaning the “switches” on the board where the silicon key pads connect, they are likely “printed” on, and can easily be damaged or erased altogether.
Thanks again
Ray
SUMMARY…
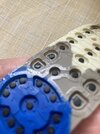
The liquid is oil seeping out of the silicon key pad over time.
It can safely be washed from the plastic parts and the key pad but needs extra care soaking it up from the PCB
The liquid is oil seeping out of the silicon key pad over time.
It can safely be washed from the plastic parts and the key pad but needs extra care soaking it up from the PCB
DIYnot Local
Staff member
If you need to find a tradesperson to get your job done, please try our local search below, or if you are doing it yourself you can find suppliers local to you.
Select the supplier or trade you require, enter your location to begin your search.
Please select a service and enter a location to continue...
Are you a trade or supplier? You can create your listing free at DIYnot Local
Sponsored Links

