How to replace micro switch in two port valve?

Joined
27 Jan 2008
Messages
25,068
Reaction score
2,910
Location
Llanfair Caereinion, Nr Welshpool
Country
United Kingdom
Switch cheap enough
1730043548208.png
but instructions only show how to remove head, it shows how connected
1730043672844.png
and head removal
1730043751665.png
but on removing the head, can't see how the head comes apart, I tapped in on the cupboard floor and the V3 switch opened and it is now working, but clearly will need the switch changing, the valve
1730043914001.png
only £50, but wired into a wiring centre where I am going to struggle to reach, other option is cut cable and fit a 5 pin plug and socket.
 
Sponsored Links
Plastic cover, not steel, and can see captive nuts, but not how to access any screws. Drayton rather than Honeywell. The valves stop the water flowing in reverse direction should only one pump be activated, it is a C Plan, but house and flat, so I can run the house without the flat. The micro switch sticking means the pump runs against a closed circuit, the boiler not a problem, it heats the DHW.

I only found out by chance, fitted a second thermostat in parallel to the first, as the hall cools too slow, but the living room has alternative heating, and also don't like relying on batteries, so Nest Gen 3 in the hall will run CH and powered from 12 volts from flat, but if living room too cool, then the Wiser thermostat will also now fire up boiler, I had thought I had made an error, a senior moment, but no, simply the micro switch stuck, and a sharp rap on floor freed it, but think now prudent to change it.
 
Switch cheap enough
1730043548208.png

Ouch! They used to be 50p each in Maplin, last I bought for that same purpose.

but wired into a wiring centre where I am going to struggle to reach, other option is cut cable and fit a 5 pin plug and socket.

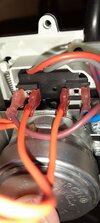
It was such a regular issue on my heating system, that I devised a quick way to wire the in, without plug and sockets, is a strip of four choc blocks, one side your actuator wire, other side some short bits of bare 2.5mm. A second strip of four, in the wiring centre, wired to the wiring centre terminals, to match. Plug the two together, tighten the screws, you have your plug and socket.

If you have a spare actuator, fit that ready, with a chock block plus 2.5mm, ready to plug in.
 
Sponsored Links
Done it on the late in-Laws' valves some 10 years ago... Probably soldered... can't recall now. Needs the motor etc.,. unscrewed to access IIRC... eBay sellers have the correct microswitch part number.
IIRC they were just button microswitches, no lever (as pictured) - but I may be wrong.

Drayton ZA5 or ZA6 or the equivalent British Gas number. You Tube has a few videos I believe.
Back in the day I went off a simple heating company's website with pictures showing how to do it.

https://www.switchelectronics.co.uk/products/5-pole-male-and-female-locking-lighting-connector-16a
or something similar might be the way to go to make things easier to convert to a plug in item?
 
Don't mess around replacing the microswitch within the valve head. Just replace the whole valve head instead. Much simpler!
 
Don't mess around replacing the microswitch within the valve head. Just replace the whole valve head instead. Much simpler!

Simplicity, is never the point..

The point, is that of a learning experience, and a learning experience is valuable, and is something which should never be missed.
 
Hmmm....if you just want your hot water back ASAP then you might wish to forgo a learning experience
 
Don't mess around replacing the microswitch within the valve head. Just replace the whole valve head instead. Much simpler!
Context is everything!
Yes, for a DIY'er, swapping the head is so much easier.
However, as you are a relative newcomer to the forum, it may be useful to look at the OPs previous threads first - it gives context, and has certainly saved me some grief in the past, when the poster has been a wind up merchant etc.
 
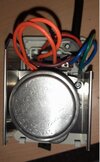
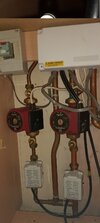
Looked at it again today, Motorised valve inside 2.jpg got cover off, easy when you know how, Motorised valve inside 1.jpg don't think changing micro switch is really an option. Working again, but clearly needs changing, the valve easy to reach, Motorised valve overview 3.jpg but the wiring centre where connected is another story, think it is time to call my son, and ask for help. Knowing how to do it, is not the same as doing it at my age.

Thought I could latch the valve open, so if it does stick, pump not pushing against closed valve, but as soon as valve activated the latch drops out. Only 4 years old, had expected them to last better than that.

Can't even see the micro switch, there is a terminal board on top of it, and without a spare not worth playing, at least my heating works as it is.

What did surprise me, was on turning off power, how long before Wiser hub/thermostat/app took to re-insulate, the Nest took a minute or two, but the Wiser had the current temperature blanked out for nearly 10 minutes and would not turn on, until current temperature shown on the app, did not matter as could use the Nest to turn on/off to test, but it must be a problem for heating engineers to have to wait so long before they can test.
 
Last edited:
if microswitch is stickin and not stuck fast then a squirt of wd40 can sort it out
As for changing the head its cheaper to buy the whole valve usually
 
I was considering War Department 40, but it is inflammable, so was a little indecisive, should I use it or not. And yes it seems whole valve is the way to go, the head is same price as whole valve.
 

DIYnot Local

Staff member

If you need to find a tradesperson to get your job done, please try our local search below, or if you are doing it yourself you can find suppliers local to you.

Select the supplier or trade you require, enter your location to begin your search.


Are you a trade or supplier? You can create your listing free at DIYnot Local

 
Sponsored Links
Back
Top