- Joined
- 11 Dec 2013
- Messages
- 27
- Reaction score
- 3
- Country

Hi all,
I have a problem with my Loft Conversion (have just bought the 1920's terraced house and the LC was already in)
Its freezing up there, due to the fact there is ZERO insulation, just plasterboard.
I am now in the process of insulating the pitched roof, however I cannot find a solution to the problem:
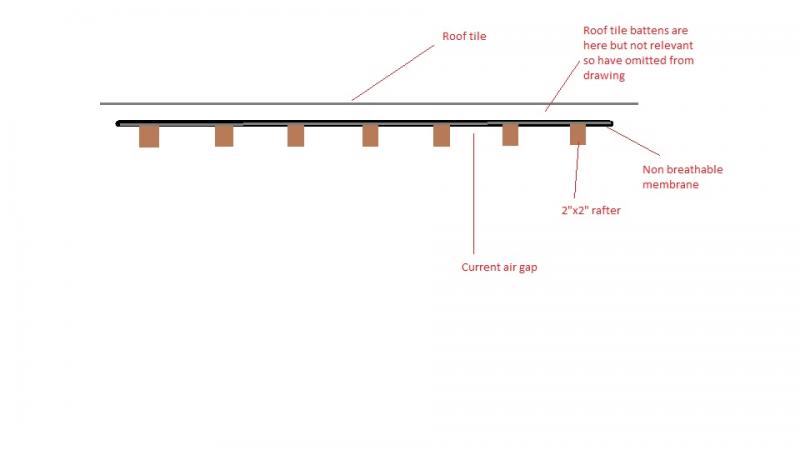
*The construction is made up of (from outside in)
1-Roof tiles
2-Roof tile battens (unsure of size at this time)
3-NON breathable membrane between rafters and tile battens
4-Roof rafters (2"x2") every 400mm
5-Roof A frame sitting central to the house (doesn't penetrate into void currently)
6-Plasterboard
I understand the plasterboard has to go and new insulation has to be fitted.
However I am unsure how or what insulation I should be fitting and where? Do I need to push up 50mm solid Celotex/Kingspan flush up against the non breathable membrane sitting between rafters? Or should I try and maintain an air gap/ventilation of 50mm and just sit insulation board against the whole underside of the rafters? (there is no venting where the two roof faces meet on the apex) so there will be no X ventilation.
Space is an issue here as there is not much head height.
So..
Is it worth leaving a vent space (50mm) between the non breathable membrane and the insulation to avoid condensation build up?
Or should I just go ahead and install 50mm Celotex between rafters flush against membrane and cover with an additional 20/30mm Celotex sheet over the whole space to prevent thermal bridging and finally provide a 100% sealed vapour barrier before plasterboard?
I would also like to mention, I have a rather expensive white 100% waterproof paint which I plan on using for the final coat to provide an additional backup vapour barrier.
Any and all comments welcome!!

