Weird kitchen light switch with 3 x yellow/green earth wires

Joined
30 Sep 2023
Messages
14
Reaction score
1
Location
East Lothian, Scotland
Country
United Kingdom
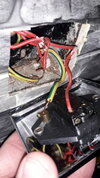
So was gluing some of those stone look PVC tiles to kitchen wall today. Thought I would do things properly and unscrewed the kitchen light switch to cut the hole out neat and have a professional look to things. So the tile sheets do look great around the light socket.

However some wires came lose in the light switch, and my kitchen light and living room light (room next door) no longer work. I have tried a few things but can't either to work. Never seen a light switch wiring like this before.

The red live wire is still connected fine. I am not sure what to do with the 3 green/yellow earth wires. I *think* at least 2 of the green/yellow wires were wrapped around a screw located in middle bottom of light switch (the screw is not part of the switch panel or used otherwise). If anyone can help advise what needs to be done and what needs to go where, will be most grateful.

I attach a photo.
 

Attachments

  • kitchen-light.jpg
    kitchen-light.jpg
    302.5 KB · Views: 147
Last edited:
Sponsored Links
The 3 green and yellow wires are wrapped around that screw, which should then be screwed in a hole in the metal backing box.
You 'appear' to have a live feed to the switch but there are 3 reds coming from the top of the back box in the background. This means the other two reds should be attached to the hole at the top of the switch, furthest away from the red that's connected.

Make sure power is turned off first!!!
I think the screw is in the bottom lug of a 4 lug box similar to this
1696107542248.png
so I'm not surprised they came off. They'd more likely be more stable if all twisted together but then would be a chunky thing to bend round it. These would be even better
1696107319251.png
1696108419233.png
 
Last edited:
Thanks for all the suggestions. So I did put all the yellow/green earth wires round the screw like in last photo. I realised I could just loosen the screw also and get a good fit, then tighten it up. I realised the 2 red wires that joined which were quite blackened had probably blew at some point and there had been a trip. So I cut them back a bit and reconnected them also. It all looked good.

So end result has been partial 50% success. The living room light is now working again! However the kitchen light which is the light switch working on here still not coming on, strange one? Does this narrow it down to there is something not right with yellow/green earth wires, and the red live wires are seeming fine?
 
Sponsored Links
If it were me, I would connect all red wires into a block connector so I can test each wire without risk of touching some thing live, and use the earth as a return for the meter, as it seems likely some thing has tripped and you are lacking any power.

I had some thing similar in my dad's house, the kitchen had been refurbished and there was no earth to lights, so a FCU feed the kitchen lights so they could get an earth. Took me ages to find the FCU (fused connection unit) was corrected when whole house rewired, but from what you say seems likely some thing some where has blown or tripped.

Today I have a non contact voltage tester built into my meter, which means I don't need to use the earth, but before working on electrics we need to prove dead, so although in theroy we should have proving units etc, in practice we do need some sort on meter or test lamp and really need to use contact types, but I still used my neon screwdriver, more as a second string to the bow in case what I have selected as a return is not really a return when using a meter.

But before we can really help, we need to know what you have, with no test equipment I would connect all reds together in a block connector and see if lights work then on switching power back on, as I do think some thing has tripped, but as pointed out many times wire colours don't really tell you what they do, so one red could be a neutral not a line, so connecting all together could mean a direct short, unlikely, but possible.
 
I am confident the red wires are right. As I knew these were connected like I have now when light worked before things fell apart. And tidying up the iffy red wires and cutting them back and reconnecting, this has been the difference in the living room light working again (assumed/likely).

I am not confident all the earth yellow/green wires were all attached around the screw, so I might try your suggestion later of terminator blocks on all the yellow/green 1 by 1 and seeing what that does to both living rm light (now working) and kitchen light (not working) as a tedious trial and error process that hopefully helps. I usually take a photo of how things look before start embarking on working on electrics, I just never intended to on this case. A lesson learned!
 
As the living room light is now working, after re connecting the 2 loose red wires, I suspect you may not have put them both into the com terminal in the switch. The com terminal is the single terminal at the opposite end to the terminal that contained the single red wire .
The earth conductors have nothing to do with your kitchen light not working.
 
I'm sure I'm wrong but it looks like there may be 4 red wires.?

To confirm Conny and Terry's advice it would normally be looking something similar to this although I can't tell in the tangle which I should have aimed for in the top left. (although there are odd switches around with terminals in different positions to normal). The common terminal is usually marked as 'COM' or 'C' or 'L'. Other selections of markings exist, do let us know what yours are if the pic doesn't work.

1696162969333.png


Of course we are assuming it is simply a wiring issue, You mention the wires were blackened, did anything trip or fuse blow during your work? or any other bangs or flashes? Is there a possibility it tripped when you switched the kitchen light on?
 
Yes there are 4 red wires.

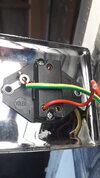
On the switch there is:
L (top) - empty
L1 (bottom left) - red wire in here
L2 (bottom right) - empty

As attached photo.
 

Attachments

  • 20231001_143836.jpg
    20231001_143836.jpg
    202.1 KB · Views: 70
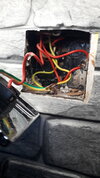
So this is what looks like now. All 3 yellow/green wires are attached to the screw tightly. I am not sure all 3 were though. I have this thought maybe 2 were and 1 was just loose (but not with a termination blocker as none were in place). The red wire to the right middle, is actually 2 red wires connected to each other, the bit I tidied. You can't see the wires connect as hidden beside the screw slot middle right.
 

Attachments

  • 20231001_143857.jpg
    20231001_143857.jpg
    244 KB · Views: 68
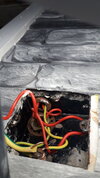
Lastly this photo for completeness shows the top of the inside just so can see what wires are coming out from the inside of wall.

To answer a previous question. Yes something did blow when I was assessing the light and moving it around and trying to turn it on/off. The consumer unit in a hallway cupboard, the light switch tripped at that time. At the moment nothing is tripped. I also tidied up the red wires and cut back for reason of there was a little glue from the wall tile sheet had got on a bit and it felt sensible to tidy it up.
 

Attachments

  • 20231001_144302.jpg
    20231001_144302.jpg
    240.2 KB · Views: 68
You aren't making a lot of sense.
With only one red wire connected to the switch it can't operate anything.
The two red wires connected together need to go together in switches com terminal (L on your switch).
 
Last edited:
That is because I don't know what I am doing. I never intended to mess with the electrics here. If I do, then I always take a before photo or two, or sketch out what is going on. On this occasion, it was more what has happened here, and what was going on there, particularly as never seen a light switch like this type.

So the good news is I have now done what you @terryplumb @SUNRAY and @conny have all suggested and put the 2 red wires into the L, and hey presto kitchen and living room light both working tickety boo.

Much appreciated all who commented on this thread, hope it helps someone in future. I have other non light elec sockets to remove as part of this wall tiling job, so just in case I will be documenting what is going on before get stuck in, just in case.
 
Glad it all went right in the end.
Just a word of caution here though. lighting can sometimes be very complicated even to those in the know on occasion.
If you consider mainly three, complety acceptable, different ways of connecting supplies to switches etc and various different approaches therin as well.
Sometimes people do a mixture of one, two or all three ways and subways therin too.
Colour coding is not always adhered to.
People often use the supposed earthwire (either bare or sleeved green/yellow) as another live.
People often cut wires too short and/or so untidy making it difficult to see what is intended.
Sometimes they connect wires that are not even needed.
Result, sometimes can be a nightmare to follow and very often you might be following the meddling of two or more different muddlers.
The connecting method of the earthwires prior to your correcting it tells a story too.
Don`t get me wrong, I am glad you sorted it, but be careful out there, electric can bite you.

PS - Many years ago I got past the stage of ever expressing the words "Well I would not have expected someone to do electrics like that"
 

DIYnot Local

Staff member

If you need to find a tradesperson to get your job done, please try our local search below, or if you are doing it yourself you can find suppliers local to you.

Select the supplier or trade you require, enter your location to begin your search.


Are you a trade or supplier? You can create your listing free at DIYnot Local

 
Sponsored Links
Back
Top