Workshop Mk2

Joined
1 Oct 2007
Messages
656
Reaction score
25
Location
Hampshire
Country
United Kingdom
I have a decent brick built workshop in my garden (yay)
It's in a really sunny area and deprives us from more sunny usable space (boo)
I have some space down the side of the house to build a new workshop (yay)
But it's a really tight squeeze and has some technical challenges (boo)

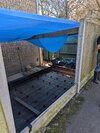
I've been digging the site out for about 5 years now, unsure what exactly to do with it and at the moment it's looking like this:
1729151875829.jpeg


Measures about 6x2.8m. This is now ~600mm below original grade and is dense clay.

I want to maximise space, so I'm going single skin and due to a roadway beyond the fence, can't do strip foundations or double skin without bringing the wall further into the garden or eating into internal space. I am literally trying to shave off cm to get this to fit to a full block. And while I'm not planning to heat this at all, I would like to insulate my foundations so the temperature swings aren't as bad.

My current cross sectional plan is:
1729152531582.png


I appreciate this isn't a typical build as it's not a typical site.

The stainless flashing will be custom made to ensure the DPM is protected from termination down to below grade.

My only worry at this point is whether the slab will be strong enough (100mm thick with mesh in centre, 300x350 edge thickening) when situated over the EPS and with the dense block walls around the perimeter. I've found a lot of example foundations that either only have stud walls, or have many more reinforcing bars.

Also, there is an old foundation from an demolished extension that sits 350mm below the top of my formwork in one corner, however the top of the formwork is 100mm above grade on one side, so I'm only 250mm below grade on the lower side (Should say I am WELL below any organic layer and into healthy subgrade all around.

Critique of plans welcome as I've yet to install anything but the formwork frame.

Fubar
 
Better off with a conventional build and an eccentric foundation on the boundary side (but if you shore up the fence you could dig a bit further under to fit a narrow strip) with your dpm inside. I doubt 50mm of insulation below a 100mm slab will do anything. Unless the ground is much higher on the other side of the fence your retaining wall looks over engineered.
 
Why do you say better off. Is it a technical issue or a cost/effort issue? I'm keen to pour slab as it involves less soil removal. However if it's unable to take the load, of the build or movement I need to change plans.

I agree it's over engineered for such a short height, but between the roadway and a desire to mount things from it inside, I'm fine with the extra expenditure.

I want to keep the the temperature as stable inside as possible without breaking the bank. It's not much, but it's better than wet soil. I feel it will help with the clay movement, but appreciate its not a typical build
 
It's just easier. Nothing wrong with what you're doing if you've committed to it - but a conventional build doesn't need rebar, shuttering - just lay a strip - blockwork up to FFL, MOT, dpm and slab.

Unless there's some kind of issue with movement in the area - your house, nearby houses and buildings? Is your house built on a raft foundation? Has an engineer assessed the ground conditions and designed it? (I'm no expert but always believe a raft was for soft ground.)

If not your probably just overthinking it a bit - the ground isn't going to suddenly heave up and tip your shed over like a disaster movie.

Unless it's heated your dense floor and walls will stabilise the temperature.

You are right to focus on the dpm detail - and be aware that while it's pretty good, concrete blockwork isn't waterproof and you'll need an effective barrier over the entire walls above ground - cladding/render etc.

It looks fairly similar to my extension, I have dense clay (I think it's boulder clay given that it has boulders in it!) and had to build a bit below ground.

Just a bog standard strip foundation and slab, built slightly off centre of the slab to get as close to the boundary as possible. I have a cavity wall so was able to bring the dpm up inside the cavity.

Screenshot_20241017-214504.png


Screenshot_20241017-214636.png


Screenshot_20241017-214604.png


If you look where the wheelbarrow is in the first picture, that's now the patio - 600mm of ground behind is happily retaining by vertical paving slabs set in concrete.

IMG_20241018_092731715.jpg
 
Thanks cdbe. Ultimately, I'm quite far down the route of my original plan with respect to layout, dig and materials which is the main drive to continue. It is *just* a worry that I'll get some odd-ball heave and it'll be a very big, very heavy mistake (although a rather excellent DIY disaster post).

Ideally, I would love to find an account of a slab foundation failing and the root cause being analysed. Or someone who's done similar and an account of how it was 10-20 years later. Or, an experienced builder who has a good idea of how close to failure this design would exist at.
 
Insulation finished
1000012809.jpg

first DPM going in
1000012811.jpg

Stepping away from the project for a couple of weeks, so have filled the DPM with water to weigh down EPS and support the sides.

Need to do a tidy when back. I am so glad the digging is over. It's easily been 5 years on and off

Come a looong way from where it was...
1000012814.jpg

1000012813.jpg
 
Come on 2025!

Spring is in the air, the leaves have all come down. The magnolia has yet to shed its flowers. The weather is good.

Time to dust off the winter dumping ground building site.

Clear the water, rotting leaves, mud, rubbish & weird red worm things.

Cover up the soil banks, tape the membrain and basically back to where I was end of last year.

WhatsApp Image 2025-03-18 at 21.37.47_eecea0c4.jpg


Then it's time for some HEAVY METAL!!!!

WhatsApp Image 2025-03-18 at 09.08.00_0996f6e5.jpg


Going to finish up rebar tomorrow, few more 10mm bars along the length and mesh.

Got the vibrator (hehe) on order and the float to hire

Thursday going for the pour. Wish me luck.
 
Looks good. Very similar to how I built mine. I didn't bother with fancy bent corners in the rebar, I just overlapped the ends to form a cross, but it's been fine for over 10 years now.

My pour did not go that well. It took two trucks and there was a long delay between them on a very hot day. Just about got the second pour in time. The surface had a few ripples in it. I'm sure a professional would've done a lot better but I'm happy with it.
 
Lifting the panel
pre pour, panel out.jpg

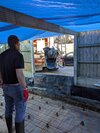
Waiting for the lorry... Very limited access.
pre pour, waiting.jpg

ACTION SHOT!
pouring, action shot.jpg

Slightly spicy action shot ;)
pouring, wit hbum.jpg

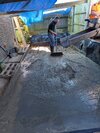
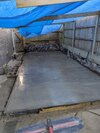
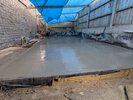
It's in! Looks.... awful.
pour complete.jpg

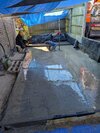
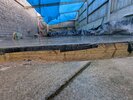
But with a bit of troweling.... Noice.
troweled.jpgSmooth.jpgLow angle.jpg

Now just waiting for a cat to fall in it......
 

DIYnot Local

Staff member

If you need to find a tradesperson to get your job done, please try our local search below, or if you are doing it yourself you can find suppliers local to you.

Select the supplier or trade you require, enter your location to begin your search.


Are you a trade or supplier? You can create your listing free at DIYnot Local

 
Back
Top