Damp issues.
In 2023 I had a lot of damp work done. My house is a solid wall house (mix of solid brick and stone with no cavitys at all) old semi detached 1910 bulit.
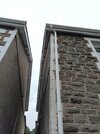
I had the front stone wall repointed, than masonary cream added. Side of house rerendered due to rising and penetrating damp. They said they used a lime render on the front and side.
I also had inside walls in the living room and 2 bed rooms striped back to the original stone and brick, there specialist waterproof system and salt retandant render used to prevent moisture and salt damage ( what they said would fix the damp issues). Damp course injected into the walls and finished with gypsum plaster.
After all above, guess what still damp issues. We have damp and 16 to 17% moisture levels of damp in the living room walls which is noticeable.
Upstairs I haven't noticed any damp or mold on the walls yet ( moisture levels same 16 ) but have on the skirting boards but I reglossed them a few weeks back and haven't noticed any mold back on them yet.
I have read a few different buliding forums that the problem is that gypsum plaster isn't suited for solid brick/stone houses as it doesn't let them breath, holding in the moisture with no where to go and lime plaster should of been used. Also these injected damp course don't do much and should be a slate damp course ( which all makes sense to me as we had the house done up 15 years ago and a few years after it was done we had damp again as they used injected damp course and gypsum plaster. No lime used) when done 15 years ago and the problems happened than I thought it was cause the buliders were cowboys ( didnt know at the time) but the same has happend when using new buliders with a good representation.
We also have an issue with condensation but same buliders installed a piv unit in the loft. We have trickel vents and I open windows when cooking and have the hobs on etc.
It is as simple as the only way to fix this is to have it all hacked off and lime plaster used? Or any fixes with keeping the gypsum plaster on ( maybe some how lime being added into the walls)? would air vent/brick vents make any difference at all with it still being Gypsum plaster to stop the mold?
Also they left big gaps all along the bottom of the walls, which have since had skirting boards added over the top of them. At the time I thought this was weird and questioned it but they said this is where the damp course is and shouldn't be plastered over.
The company I used are damp specialist ( or so they say ) from checkatrade and very good reviews so that's why I used them and fully trusted what they said and did but don't any more.
I had one of there specialist in yesterday to take a look and said about the above and what I researched but all they did was defend there work by saying we used the same materials with every house both new and old and never had an issue with damp coming back and go on to say maybe have vents put in as it's nothing to do with the plaster or a failed damp course but seems poor ventilation. ( none of which makes sense as we have the fan they installed and had an engineer last summer look at it and its working fine ). They go on to say that any moisture levels above 18 is a concern ( as thats what they have been told by there training guidelines) and they levels are below that so must be condensation they say. I have done the research and different damp specialist seem to go by different figure's but the ball park seems to be anything over 15 to 16 needs attention.
It is the winter and I get levels ofc are higher but remember what I remember in the summer the levels of moisture where a bit lower but not by much.
Any advice would be great on how to deal with the company and fixs for the issues.
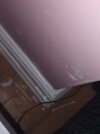
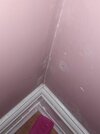
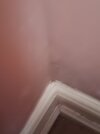
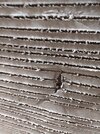
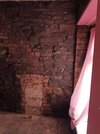
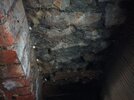
I have add a number of photos to this poster of the current damp and mold. Photos of when the work was being done ( down to the original stone and brick. Plaster work etc)
Many Thanks.
Attachments
-
 20250108_132250.jpg140.9 KB · Views: 25
 -
 20250108_132237.jpg176.5 KB · Views: 21
 -
 20250110_184933.jpg95.9 KB · Views: 20
 -
 20250108_121759.jpg97.1 KB · Views: 20
 -
 20250108_121755.jpg115.6 KB · Views: 24
 -
 IMG-20230828-WA0003.jpg351.1 KB · Views: 29
 -
 IMG-20230731-WA0002.jpg241.6 KB · Views: 26
 -
 IMG-20230728-WA0018.jpg176.4 KB · Views: 22
 -
 IMG-20230728-WA0010(1).jpg136.8 KB · Views: 24
 -
 Screenshot_20250114_065219_WhatsApp.jpg32.9 KB · Views: 26

