DIY MDF Skirting

A few years ago MDF was cheaper but not any more.
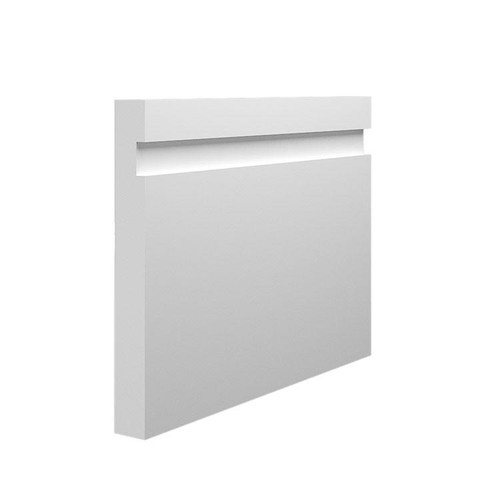
Those sharp edges will make your life very difficult. Painting them without buildup on the inside corners is hard work (spraying possibly a better method), your mitres and corners have to be absolutely spot-on (any feathering will stand out instantly), the sharp top edge will highlight any impact damage, you'll get dust buildup in the channel. Entirely up to you but it feels like a showhome style- looks slick but doesn't work in the real world.
Would this also be the case if we bought the pre cut primed and ready? We couldn't possibly spray paint them once they are permanently on! I get the whole dust issue in the groove but going over it with a hoover brush should be fine. I know it will always be finicky to paint over but that's the price to pay for the design.

I personally want to buy the skirting but husband is not willing to have wastage and spend more money and won't agree till I try everything.
 
Sponsored Links
P21 grit sanded first then primed then water based paint. Sanded again and painted to test. All seems too time consuming!
Unfortunately you need to sand to a higher grit than P120 initially, then apply several coats of primer, denibbing between coats (P240 or P320) before applying the top coat and yes it is time consuming. With oil-based coatings you can get away with less undercoat layers for a reasonable finish.

In the trade we tend to install pre-primed MDF skirting - it comes in with a denibbed high solids oil-based primer and will take a gloss finish straight off (after you've done any filling of pin holes, etc). Inside corners need to be tightly scribed, outside corners need to be accurately cut and bonded with something like Mitre Mate (so a tight joint requiring no filling is an absolute). In construction MR-MDF skirting is preferred because it comes in long lengths (up to about 6m), is defect-free, comes pre-primed when we get it, and joins well with very low wastage.

Softwood, on the other hand, often comes to us in random lengths, some of which have to be scrapped or at least cut down because they have defects such as warping, splits, shelling (grain separation of the "cathedral arch" grain), dead knots, etc. Knots can be dealt with by either cutting out, and scarfing on another piece or in some cases by applying patent knotting, sanding, filling and resanding (more work). Softwood, being a natural material, is much less dimensionally stable - it moves with changes in the seasons - so good scribes are a must, and the grain pattern is often there until you've repainted a couple of times. In real terms this makes softwood, at the same price per metre of raw material, about 25 to 35% more expensive once installed and painted as well as adding extra time to the job - or if you are DIYing it makes for a slower, more labour intensive job than using pre-primed MDF
 
I bought some Torus from Skirting World and went for primed and undercoated.
The profiles needed sanding but the flat surfaces were smooth and ready for painting.
Pretty sure I read that they prime and then run it through a machine to sand before the undercoat.

 
From where you are at the moment, try the process described by @JobAndKnock on a couple of sections and see how it goes. MDF has its advantages (as he's detailed above) if you want a painted finish- especially the dimensionally stable bit- I've got a long (7m) straight run of 175mm timber Ogee skirting, the end (butted to architrave) moves by about 12mm summer to winter.
 
Sponsored Links
I bought some Torus from Skirting World and went for primed and undercoated.
The profiles needed sanding but the flat surfaces were smooth and ready for painting.
Pretty sure I read that they prime and then run it through a machine to sand before the undercoat.

Which grit sandpaper did you use and did you only sand the edges? Was it oil based paint you used? Thanks
 
Which grit sandpaper did you use and did you only sand the edges? Was it oil based paint you used? Thanks

This is the skirting I have. 1930s house


The large flat section at the bottom did not require sanding (I did sand with 240 after first coat)
The angled and round bits were a little rough as not touched when it went through their sander and needed sanding before painting.
With the style you are going for, the recess may need a sand but the rest should be pretty good.

Was satisfied with the service and material from skirtingworld

Mrs wanted matt finish so I used Zinsser Perma White Matt
 
Try telling the old man this I never wanted to do it in the first place! Time is also money!
It is. I used a length of similar in our bathroom and it was done and dusted in 10 minutes. Cut-to-size, a blob of glue on the back, silicon round the edge. Sealed. Sorted. All-white; all-right; easy-to-clean. Why wouldn't you?
 
This is the skirting I have. 1930s house


The large flat section at the bottom did not require sanding (I did sand with 240 after first coat)
The angled and round bits were a little rough as not touched when it went through their sander and needed sanding before painting.
With the style you are going for, the recess may need a sand but the rest should be pretty good.

Was satisfied with the service and material from skirtingworld

Mrs wanted matt finish so I used Zinsser Perma White Matt
It's nice that your Mrs gets what she wants.
 
It's nice that your Mrs gets what she wants.

I am an Engineering/Computer person.
Everything would be square, in size order and in odd colours.

She makes things look nice and never complains about me buying tools . :love:
 
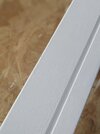
This is what I got after sanding with 240 two coats primer two coats satin top coat. Both water based as that's what I have right now.

It's an improvement but still getting some mottling.

PXL_20221001_142025892.PORTRAIT.jpg
 

Attachments

  • PXL_20221001_142013521.PORTRAIT.jpg
    PXL_20221001_142013521.PORTRAIT.jpg
    173.9 KB · Views: 68

DIYnot Local

Staff member

If you need to find a tradesperson to get your job done, please try our local search below, or if you are doing it yourself you can find suppliers local to you.

Select the supplier or trade you require, enter your location to begin your search.


Are you a trade or supplier? You can create your listing free at DIYnot Local

 
Sponsored Links
Back
Top