Opening a continuation of this post, as I actually had more queries before everyone started bickering...
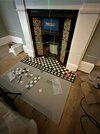
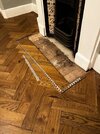
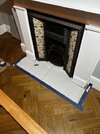
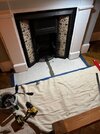
I've received the tiles now and made a rough layout. I am not intending to use the warm-up board, I just want to use it to make a perfect cutout for the flooring guy to work around. The Warmupboard is 1250mm wide, but all the hardibackers (or any cement board) are only 1200mm. I've indicated the red line, where approximately 1200mm is. So I need to use two boards and there will be a weak spot where the two boards join together. What would you recommend where this weak point should be?
1. Keep it at the outside that 95% rests on once piece and that little bit on the right is on a second small piece, risking a weak edge
2. Make two symmetric pieces and have the cut/transtion smack down the middle?
Other question, if I have space, any harm adding a schluter decoupling matt? There seems to be more and more preference to use decoupling instead of hardibacker. Or will it make things worse?


