Gap around DIY Window Seat Lid. And Number of Hinges?

Much the same framing as mine! Yes, just screwed into the MDF; the lid is fully supported so the hinge isn't taking any load. I also skipped the stays, sometimes it's annoying mostly it's fine. I also didn't have to be too 'pretty' about the top as I had a seat cushion made to cover it all.
There's no way I could have used a cutting service either as I was making it up as I went along :)

View attachment 294881
View attachment 294880
So this looks great. Nice job. Yes I’ll be making the cushion cover for mine as well, so the top will be covered too.

From what I can see you have two openings to the top? I may do this too to lighten the load overall.

Yes pretty much making it up as I go along too, in some ways it’s better cos it means you can be flexible in the way the finished product looks.
Thanks for your input.
 
Sponsored Links
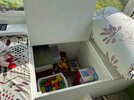
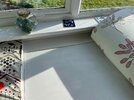
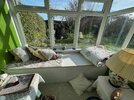
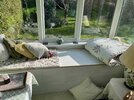
all a bit of a mess , but may get an idea from this

i have 4 openings - 2.47m across the conservatory - so probably a lot wider

all 18mm MR MDF - and i lipped the edge with a bit of Moulding

I used some furniture board for the partitions - which were cut by B&Q, so the inside was clean
so the lids sit on front edge and also the partition and a batten
also Mdf across the back to allow the lid to open past the window sill and also lay back , so stays open on its own

i used 4 sets of piano hinges from wickes, cant remember where i got the piano screws from.....
 

Attachments

  • IMG_0320.jpeg
    IMG_0320.jpeg
    302.7 KB · Views: 78
  • IMG_0319.jpeg
    IMG_0319.jpeg
    302.8 KB · Views: 76
  • IMG_0318.jpeg
    IMG_0318.jpeg
    517.3 KB · Views: 83
  • IMG_0317.jpeg
    IMG_0317.jpeg
    490.8 KB · Views: 68
Last edited:
So this looks great. Nice job. Yes I’ll be making the cushion cover for mine as well, so the top will be covered too.

From what I can see you have two openings to the top? I may do this too to lighten the load overall.

Yes pretty much making it up as I go along too, in some ways it’s better cos it means you can be flexible in the way the finished product looks.
Thanks for your input.
Yes just the two lids with a hole drilled through to lift them (round off the edges). In honesty I might convert the othe two panels to lids for ease of access.
One thing I made sure of was ventilation. Mine is against an outside wall so was insulated with PIR and the main seat has vents to the cupboards which have concealed vents under the shelf. I hoped it would keep mould away and so far so good. I also put in the carpet and underlay that was chopped off for the build.
 
Shout if you want details of the seat cushion maker. I found them on Etsy and far cheaper than anywhere local to me
 
Sponsored Links
all a bit of a mess , but may get an idea from this

i have 4 openings - 2.47m across the conservatory - so probably a lot wider

all 18mm MR MDF - and i lipped the edge with a bit of Moulding

I used some furniture board for the partitions - which were cut by B&Q, so the inside was clean
so the lids sit on front edge and also the partition and a batten
also Mdf across the back to allow the lid to open past the window sill and also lay back , so stays open on its own

i used 4 sets of piano hinges from wickes, cant remember where i got the piano screws from.....
This is great and nice to see pictures. Looks ideal. Will check out furniture board, but may well leave open and (as Loofah has done) use the carpet remnants as a floor covering.

Thanks again for your input.
 
Thanks Loofah. So I’m planning on leaving the inside pretty basic so not sealing off the back it bottom. Like you I’ll be using the carpet remnants for the inside floor. I guess with ventilation, it’s where to hide it on this project.

Luckily I’ll be making my own cushion cover having done this before on some dining room chairs, which look great, so no need for extra expense, but thanks for the info.
 
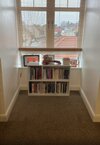
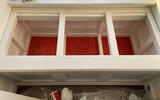
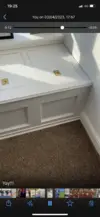
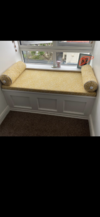
For those who might remember, it’s a while ago. I finally finished the window seat I asked for help with. Have never made anything like it before and with help from some on here am happy to say it turned out brilliantly.
Very pleased with the seat and booster cushions I made too. So all in all very pleased.
Thanks to everyone who gave advice.
Before during and after photos attached.
 

Attachments

  • IMG_8502.jpeg
    IMG_8502.jpeg
    194.4 KB · Views: 60
  • IMG_8507.jpeg
    IMG_8507.jpeg
    319.4 KB · Views: 59
  • IMG_8504.png
    IMG_8504.png
    997.4 KB · Views: 66
  • IMG_8506.png
    IMG_8506.png
    674.7 KB · Views: 76

DIYnot Local

Staff member

If you need to find a tradesperson to get your job done, please try our local search below, or if you are doing it yourself you can find suppliers local to you.

Select the supplier or trade you require, enter your location to begin your search.


Are you a trade or supplier? You can create your listing free at DIYnot Local

 
Back
Top