Long time reader, first time poster!
This might get a bit long, I'll do a TLDR at the bottom.
Been laying laminate downstairs and when I moved some furniture in the last room to finish it, I found sections of the floor to be bouncy. Worth noting early on that half the laminate is done and I cannot undo it as the instructions said to use glue along the short edges. (It's Kronotex herringbone if you wanted to look it up)
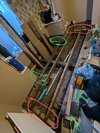
After I investigated further I found some joist ends and sills to have deteriorated. However, I am not quite certain of the best way to fix it. There are 4 joists in need of attention in total - 2 in the bay window and the 2 after them. They look to be very old, maybe even from when the house was built in the early 30s.
I initially thought about replacing them fully, however finding the correct size (87mm height 55mm width) seems rather difficult. The alternative would be to buy taller ones and notch them. However, I am not sure whether that will help, because I also found out that the sill in the middle sits taller than the ones at the end! The existing joists have bowed a bit in order to sit on. So my next thought was to sister them to some construction timber I have found of that size from my local reclaimed wood place. Unfortunately these are not treated.
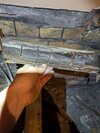
The next bit is the sills. I've removed the rotten bits but I am struggling to see what I can replace them with - the old ones are 18mm thick. I can't find any treated materials of that thickness either. I was thinking maybe marine plywood, but that's quite dear. I am planning to put damp proof membrane on the sills between the bricks/mortar and new timber - can I get away with regular plywood or another sheet material instead?
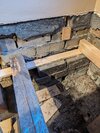
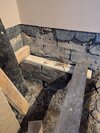
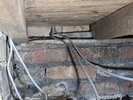
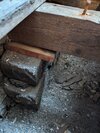
The other problem is the state of the sills in the bay window. There is no layer of mortar on them, like there is around the rest of the room. They are also not level. In fact, when I first took off the floor boards I noticed the piece of wood on one of them was not the original and there was a gap between it and the bottom of the joist! My plan for that was to stick a layer of mortar down to a) make the surface for both sills to sit on level , and b) bring that level up high enough so the joists can sit on the sill comfortably.
I've got some tongue and groove chipboard to replace some of the broken floorboards and now I'm also worried that because of the difference of level at the ends and the middle of the room, this isn't gonna sit right either.
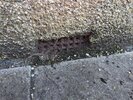
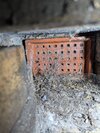
I've attached some pictures too and annotated them as best as possible to hopefully make my situation more clear.
-- TLDR --
• Found the floor is bouncy after moving some furniture around to finish the laminate floor in the room.
• Cannot remove the laminate as it's glued as per manufacturer's instructions.
• Some joists have cracked and/or rotted, so have some sill beams those sit on.
• Cannot replace joists completely because a) the sill in the middle sits higher than the ones on the sides and b) timber of that size (87mm high/55mm wide) is hard to find
• Thinking of sistering the joists with some construction timber of that size I have found, but that's not treated - is this a problem?
• The sills are 18mm thick and I cannot find any treated timber of that thickness. Marine plywood is quite expensive and I don't need that much so if there's an alternative I'd rather use that.
• Planning to put damp proof membrane between the sill beams and the mortar they'll be placed on.
• The sills in the bay window are not level or tall enough - planning to lay mortar on there to give the sill beam a level surface to go on, and to bring them to the correct height.
Pictures:
1. Sill masonry in the bay window, left hand side
2. Sill masonry in the bay window, right hand side
3. Problematic areas. Blue line - crack in the joist. Red and green circles - deteriorated joist ends and sills. Green circles also questionable masonry.
4. The state of the sill plate in the upper red circle in pic 3, also seen in pic 5.
5. Sill in pic 4 and upper red circle in pic 3.
6. How I found the lower green circle in pic 3 when I first took the floor boards up.
Can take and upload more pictures if it will help
Thanks in advance.


