Hi,
hopefully I got it right this time
Anyone know the best way to join metal boxes so they are spaced apart correctly?
That depends on what
you mean by "correctly"...
Spaced to allow a light switch and socket to fit together side by side.
This is the current set up.
//www.diynot.com/network/MisterG/albums/3956/15776
I want to get rid of the wood block, and don't want to retile. The existing metal boxes are partially sunk into the wall, so the tiles behind are already cut. The space between the two boxes behind the wood has no tile, so I was going to fit a 3-gang box and socket to fill the gap. So the socket and switch would be right next to each other.
Also want to be able to route cable from one box to the other.
The reason you can't use the knockouts in the sides of the boxes is....?
I will, but the cable for the socket currently runs under the metal box for the light switch so, I want to run the cable though the box for the switch into the box for the sockets when I sink them deeper into the wall.
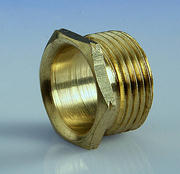
Any idea where to get the Glands/Bushes?
I've tried a few websites and they seem mainly for swa cable, where's the best place to get them?
You can get them at any wholesaler - what RF and the others are talking about are 20mm conduit fittings:

IMO using those results in a better appearance. The problem with the dual box shown above, or the connectors, is that unless your accessories have a completely square profile it just looks odd - any rounded or chamfered edges will result in a slight gap between the two. And even if they are square there's still a line.
A larger gap, with a bit of wall showing, looks better to me. And would allow a change to flat-plate accessories in the future if you wanted.
I agree, this would be ideal, but have the issue of the tiles to contend with. I am planning to add another socket horizontally in line with the current set up, so may pop off a few tiles and reorganise which tiles go where to allow me add more space between the switch and existing sockets.
As this is in a kitchen I didn't want to change too much, as I understand it under part P I can change accessories in a kitchen and back boxes, but not make changes to the cabling without informing building control and getting it inspected or getting it done by a registered spark. I'll be going for the latter for the new socket as I also need a cooker circuit installed.
The tiles cover most of the kitchen and I don't want to re-do the whole kitchen just now.
I'll try to remove specific tiles myself to allow the spark to run the new socket horizontally in line with the existing one, and to allow me to use one of the tiles to create a gap between the socket and swtich.
If the knockouts are spaced far enough apart, the use of two couplings in parallel will give a very rigid assembly, no chance of the boxes ending up at slightly different angles
I think I will end up doing this, as long as I can pop off tiles easily.
If the knockouts are spaced far enough apart, the use of two couplings in parallel will give a very rigid assembly, no chance of the boxes ending up at slightly different angles.
Thanks for the advice.
Cheers
G


