
You are using an out of date browser. It may not display this or other websites correctly.
You should upgrade or use an alternative browser.
You should upgrade or use an alternative browser.
Noisy stairs are killing us :(
- Thread starter Sard
- Start date

Sponsored Links
D
Deleted member 174758
Sorry to have asked so many questions OP. From your answers my feeling is that a few of the risers may have shrunk a little and are no longer fitting correctly into the grooves on the underside of the treads. This should be evidenced by the centre of the offending treads depressing slightly as someone walks across it. I'd expect the glue blocks in those instances to be attached to the undersides of the treads, but not to the backs of the risers
The cure is to drill 4 or 5 diagonal holes upwards at 45 degrees into the underside of the treads so that the end of the drill bit ends up in the groove. The groove is then injected with a polyurethane (PU) glue and left to set. An ideal glue kit to do this is sold for dealing with problems in laminate floors. This is a messy procedure, so wear gloves and be prepared for black hands for a few days afterwards
The cure is to drill 4 or 5 diagonal holes upwards at 45 degrees into the underside of the treads so that the end of the drill bit ends up in the groove. The groove is then injected with a polyurethane (PU) glue and left to set. An ideal glue kit to do this is sold for dealing with problems in laminate floors. This is a messy procedure, so wear gloves and be prepared for black hands for a few days afterwards
Hi all,
Thank you for the help. After much contemplation, I settled on the following approach. I measured the thickness of each riser and then screwer the tread and risers together firstly from above, making sure that I was in the middle of the riser at all times. I then drilled diagonal holes into the treads and vertical riser adjacent and screwed in countersinking screws to tighten the gap and secure them to each other. So essentially the risers and treads have been secured to each other on both X and Y axes. I used 5x40mm screws for the job and I'd say the improvement has been about 80%.
I hope this helps someone else in the future.
D
Deleted member 174758
I hope that you properly pilot drilled and countersunk for all the screws, if not driving the screws could result in the MDF splitting or delaminating, especially if you have screwed into the edges. Secondly, all your risers are plywood, and you have screwed into the edges of these plywood components. Apart from the fact that screwing into the edges of plywood does not give the strongest of connections (you should always screw into the faces of plywood sheets) this also can lead to the plywood delaminating over time
So I as a joiner I simply cannot agree that you've done a good job and I would caution anyone wishing to follow your example that they will probably doing a lot more harm than good, and that they might potentially exacerbate the flaws in their stairs. So instead if fixing it, you bodged it
So I as a joiner I simply cannot agree that you've done a good job and I would caution anyone wishing to follow your example that they will probably doing a lot more harm than good, and that they might potentially exacerbate the flaws in their stairs. So instead if fixing it, you bodged it
Sponsored Links
I appreciate the feedback but there was no other way this could have been done and I did pilot each screw and have countersunk also. From the looks of it, it's improved our situation by 80%. Time will tell if it's short lived or not.I hope that you properly pilot drilled and countersunk for all the screws, if not driving the screws could result in the MDF splitting or delaminating, especially if you have screwed into the edges. Secondly, all your risers are plywood, and you have screwed into the edges of these plywood components. Apart from the fact that screwing into the edges of plywood does not give the strongest of connections (you should always screw into the faces of plywood sheets) this also can lead to the plywood delaminating over time
So I as a joiner I simply cannot agree that you've done a good job and I would caution anyone wishing to follow your example that they will probably doing a lot more harm than good, and that they might potentially exacerbate the flaws in their stairs. So instead if fixing it, you bodged it
D
Deleted member 174758
You are wrong. The solution is to inject glue into the joints from below as I stated earlier. Having done this a number of times I know it worksI appreciate the feedback but there was no other way this could have been done...
I fear that screws will work looseYou are wrong. The solution is to inject glue into the joints from below as I stated earlier. Having done this a number of times I know it works
I wouldve used glue, probably adding timber where needed to increase gluing area
glue once cured is permanent, screws esp in MDF tend to work loose after a while
Thank you for the advice. Is there a technique to apply PU Glue from above rather than below? I can only really access the top 4 steps from below. Given the feedback, I'm happy to give the PU Glue a go as well
You can get PU glue in a cartridge gun form which will allow you to "inject" it. I guess you may be able to drill some suitably sized holes from above and inject the PU. You can practice on the accessible treads to ensure that you are drilling at the correct angle.
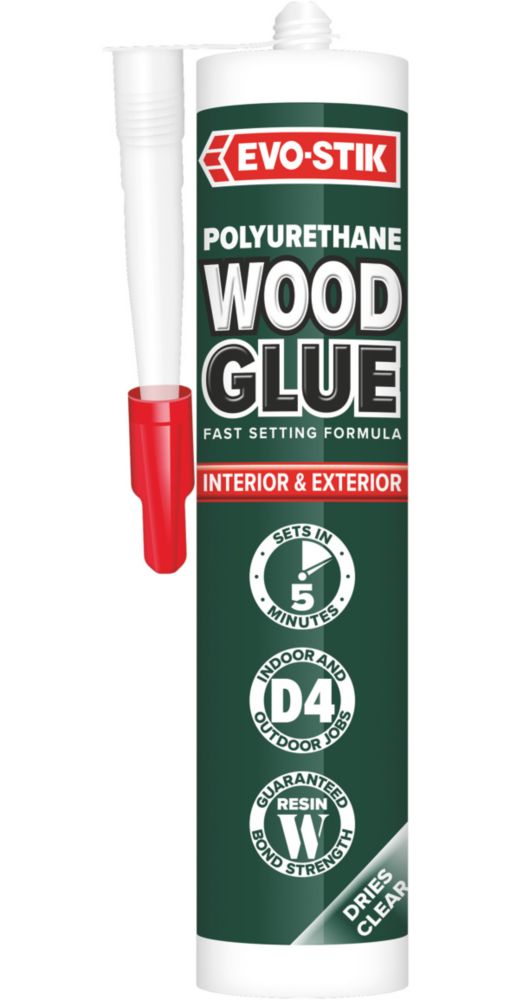
Evo-Stik Polyurethane Wood Adhesive 310ml - Screwfix
Order online at Screwfix.com. Sets in just 5 minutes for a waterproof, maximum strength bond. Can be sanded or painted. Suitable for interior and exterior use. FREE next day delivery available, free collection in 1 minute.
Cheaper versions are available.
Ideally, you would mist the hole with water, but that might not be possible. The water acts as a catalyst to speed up curing.
As it cures, the foam expands to fill (small) gaps.
As @JobAndKnock says, if you get it on your hands, you will end up with black stains.
Any excess foaming can be scraped and sanded back.
I used it (pu glue) a few months ago to deal with stair banisters that were rattling around where they are rebated into the treads. Previous decorators had simply used caulk, which had cracked. The PU glue worked well. With a couple of the bannisters I had to drill down so that I could be sure that the glue had successfully got in to the middle of the rebate.
Thank you. Coincidentally that's the same glue I just went and bought. The last bit that I'm not quite sure of, is the mention of drilling at an 'angle'? My understanding was that I'd be drilling through the tread and into the top of the riser, where the tread is rebated to accept the riser.You can get PU glue in a cartridge gun form which will allow you to "inject" it. I guess you may be able to drill some suitably sized holes from above and inject the PU. You can practice on the accessible treads to ensure that you are drilling at the correct angle.
Evo-Stik Polyurethane Wood Adhesive 310ml - Screwfix
Order online at Screwfix.com. Sets in just 5 minutes for a waterproof, maximum strength bond. Can be sanded or painted. Suitable for interior and exterior use. FREE next day delivery available, free collection in 1 minute.www.screwfix.com
Cheaper versions are available.
Ideally, you would mist the hole with water, but that might not be possible. The water acts as a catalyst to speed up curing.
As it cures, the foam expands to fill (small) gaps.
As @JobAndKnock says, if you get it on your hands, you will end up with black stains.
Any excess foaming can be scraped and sanded back.
I used it (pu glue) a few months ago to deal with stair banisters that were rattling around where they are rebated into the treads. Previous decorators had simply used caulk, which had cracked. The PU glue worked well. With a couple of the bannisters I had to drill down so that I could be sure that the glue had successfully got in to the middle of the rebate.
Thank you. Coincidentally that's the same glue I just went and bought. The last bit that I'm not quite sure of, is the mention of drilling at an 'angle'? My understanding was that I'd be drilling through the tread and into the top of the riser, where the tread is rebated to accept the riser.
Yes, I was suggesting that you drill at an angle so that you hit the void between the end of the tread and the rebate- I think that was what @JobAndKnock was suggesting. BTW, I unconditionally bow to his superior knowledge when it comes to all things carpentry related on this forum.
I normally buy PU glue in bottles but in this case the gun version is better suited.
D
Deleted member 174758
It isn't rebated - the underside of the treads are grooved to accept the top edges of the risers.My understanding was that I'd be drilling through the tread and into the top of the riser, where the tread is rebated to accept the riser.
What you are trying to do is to inject PU glue into that groove because there are gaps between the tops of the risers and the bittoms of the grooves which allows some movement. PU glue works in this instance because in contact with moisture it wlll expand and cure (hence @opps advice to add a wee bit o' water if possible - it only needs a few drops). If you are doing the repair from below, i.e. on the back of the stairs, then the only option is to drill at an angle into the void - this makes for an invisible repair from the top. If you are injecting from above then drilling vertically works just fine, but obviously will create a cleanup task plus the need to fill and sand the holes afterwards, a d it won't be invisible. Measure carefully for the drilling centre, drill slowly and you should be able to feel when you hit the void.
AgreedI normally buy PU glue in bottles but in this case the gun version is better suited.
Last edited by a moderator:
DIYnot Local
Staff member
If you need to find a tradesperson to get your job done, please try our local search below, or if you are doing it yourself you can find suppliers local to you.
Select the supplier or trade you require, enter your location to begin your search.
Please select a service and enter a location to continue...
Are you a trade or supplier? You can create your listing free at DIYnot Local
Sponsored Links
Similar threads
- Replies
- 0
- Views
- 1K
- Replies
- 5
- Views
- 5K
D