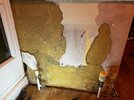
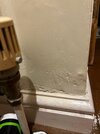
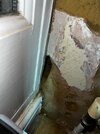
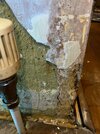
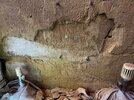
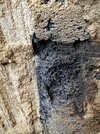
What am I looking at and how shall i fix it?

OP,
Its hard to clearly see your latest pics but the plaster/render should not be in contact with the solid floor - something to remember when you make good the defects is to keep the render about 50mm off the floor.
If you remove the plaster/render then please post a pic.
 
Sponsored Links
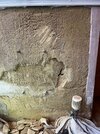
I removed the radiator and the gypsum mortar
. otherwall1.jpground the corner.jpgotherwall hole.jpgotherwall external bead.jpg
 
OP,
The plaster needs to be removed back to bare masonry - any existing DPM will then be exposed.
You might also be able to locate a DPC in the wall itself?
 
The plaster needs to be removed back to bare masonry - any existing DPM will then be exposed.
are you talking about the yellow coloured sandy stuff behind the gypsum plaster? i'm not sure how thick it is an i'm not sure what's behind it. I stuck my finger into that hole on the left and it's about 4inches deep. I think it's lime base coat, no idea what it's adhered to.
You might also be able to locate a DPC in the wall itself?
There's no DPC, this part of the wall is 300 years old.
 
Sponsored Links
OP,
Well, based on what you say & no DPM being present then I would still attempt to cut back from floor contact?
Given the age you mention then its highly possible that the nib of wall is stone faced, and filled with random rubble?
 
OP,
Well, based on what you say & no DPM being present then I would still attempt to cut back from floor contact?
Given the age you mention then its highly possible that the nib of wall is stone faced, and filled with random rubble?
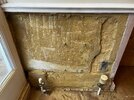
I've cut back the rest of the gypsum and found solid stone. The white is where the stone is, it's marked from the wire brush i used to remove the rest of the sandy material from it. it's flat so i'm assuming i'm "back to brick".

I'll continue to knock the rest out, including the floor contact. If i knock back the mortar below where the skirting board was, what will the skirt adhere to once it's been re-mortared?


back to blocks1.jpgback to blocks2.jpg
 
OP,
My post #16 suggested only a 50mm cut-off.
As for the material being 4" deep or so - just keep removing the plaster, or whatever it is, back until you reach masonry.

To make good, use a 3:1 mix of sand & NH lime render. And a length of plastic angle bead.
 
OP,
You dont seem to have understood that the idea is you remove all the cover material until you reach masonry.
By doing that you will have removed all the damp affected material.
Then you make good with the above mix leaving a 50mm gap.
 
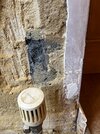
That flat area is solid, my chisel isnt going through it. The render on top has all but gone now. I think that black bubbly breeze block thing is where i was getting my moisture bubbling in the original photos. is that solid stuff still cement? I'd need to get a machine to blast though that and i'm not sure i feel confident enough to do it for fear of breaking the house.

breeze1.jpgbreeze2.jpgbreeze3.jpg
 

DIYnot Local

Staff member

If you need to find a tradesperson to get your job done, please try our local search below, or if you are doing it yourself you can find suppliers local to you.

Select the supplier or trade you require, enter your location to begin your search.


Are you a trade or supplier? You can create your listing free at DIYnot Local

 
Sponsored Links
Back
Top