How I did the Loft Light

mdbalson

There's no point in banging up pictures and then not expecting us to look at them :rolleyes: .

To say "it was too hard" isn't an excuse for errors that no one should be absolved from.

Regs state that the cable sheath should be completely inside the joint box, good practice would be to have the absolute minimum of bare cable being exposed before termination.

The sheath one, is for overheating and avoidance of potential ignition as well as element and mechanical protection.

The bare conductor for handling safety and short avoidance.

No doubt others will add to the reasoning.

Just re-work it and then be happy.

Post the remedial picture and I'll be ecstatic :D
 
Sponsored Links
Arrrrrgggghhhhhh....

Is that a "Neon" screwdriver I see before my eyes ???
 
mdbalson said:
securespark said:
Sheath doesn't quite make the interior of the JB.

It does when the lid is on the JB

That's clever, how is that possible? If the sheath doesn't enter the JB without the lid how does it enter the JB when the lid is on?


mdbalson said:
securespark said:
Copper hanging out of live terminal.

It was hard with so many cables to terminate, to get them all under the terminal screw

The knockouts around the perimeter of the junction box were not made to accept 2 cables in one knockout so when you screw on the lid you will most probably cause some damage to the insulation. Using 2 junction boxes would have been the best option if you had such difficulty in getting everything into one. Also you seem to have removed too much insulation, that isn't anything to do with the number of cables or the size of the terminals, you just removed too much.

What is the issue with the white t&e in the first set of pictures? Is that cable now dead? If so I hope you have removed it and if not I hope you have suitably terminated it.

Davy
 
Sponsored Links
Crafty said:
ppuch1 said:
Arrrrrgggghhhhhh....

Is that a "Neon" screwdriver I see before my eyes ???
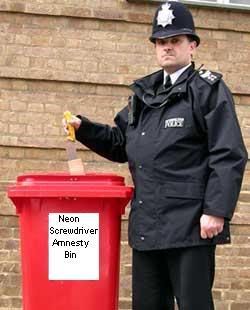
Looks like it:


He needs to take a trip to his local police station

neonamnesty.jpg
 
Could I suggest a neon on the switch in the landing - kids/visitors might switch it on accidentally and it could be weeks before you notice.

Parents house has this and it seemed a very sensible idea.
 
davy_owen_88 said:
What is the issue with the white t&e in the first set of pictures? Is that cable now dead? If so I hope you have removed it and if not I hope you have suitably terminated it.

That piece of white T+E In the first set of pictures, is the power cable for the end landing light, I had not connected it in that picture as I had not put the new light up yet on the landing, and the landing had not been finished being painted.
 
ppuch1 said:
Arrrrrgggghhhhhh....

Is that a "Neon" screwdriver I see before my eyes ???

Yes it is a Neon screwdriver, but I ownly use it as a terminal screwdriver as it is the right size head for the screws of socket terminals etc. I do not use it as a tester.
 
RF Lighting said:


Is that one of those new "neon driver-cum-cable machetes" by Kew Technik??

;)


Oh dear. The missing word is a VERY INNOCENT "c u m"

I suppose it will censor that area of Manchester called Chorlton-cum-Hardy next.... Sigh. :rolleyes:

And why does it replace a three letter word with four asterisks?? GRR! for the 2nd time tonight...
 
mdbalson said:
ppuch1 said:
Arrrrrgggghhhhhh....

Is that a "Neon" screwdriver I see before my eyes ???

Yes it is a Neon screwdriver, but I ownly use it as a terminal screwdriver as it is the right size head for the screws of socket terminals etc. I do not use it as a tester.

You can buy proper VDE insulated terminal screwdrivers.
 
Here are the remedial pictures of the upstairs Lights JB, I have now put in 2 JB as it made it easier to terminate the cables into 2 JB instead of 1:

Both JBs with their lids on:

http://i167.photobucket.com/albums/u125/mdbalson/P2120026.jpg


Close up of both JBs:

http://i167.photobucket.com/albums/u125/mdbalson/P2120022.jpg


Close up of 1st JB:

http://i167.photobucket.com/albums/u125/mdbalson/P2120023.jpg


Close up of 2nd JB:

http://i167.photobucket.com/albums/u125/mdbalson/P2120024.jpg


(The MK JB is a spare one I had in the Toolbox, It used to be in the shed at my dad's house, but was it is not needed in it now, as there is no power in the shed now)
 
Need to set your camera to Macro for close up.


You should have a 25mm grommet on the flu.
 

DIYnot Local

Staff member

If you need to find a tradesperson to get your job done, please try our local search below, or if you are doing it yourself you can find suppliers local to you.

Select the supplier or trade you require, enter your location to begin your search.


Are you a trade or supplier? You can create your listing free at DIYnot Local

 
Sponsored Links
Back
Top