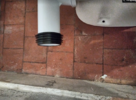
WC into understairs pantry - nightmare

Use this https://mcalpineplumbing.com/plastic-chrome-fittings/drain-connectors/drain-connector-with-boss/ gets you as low as possible for the waste connection, and provides more flexibility with the shower waste options. You can soon drop down, you cannot come up.

Shower waste, look at a trap with a removeable insert, which will allow cleaning from above. Do waste runs in solvent weld pipework, and use swept bends rather than knuckle elbows, to aid flow and make future cleaning easier. Appropriate Traps on basin and shower (sinks are found in kitchens etc), and properly run pipework, keep it as short and straight as you can, and you should have no issues with odour.
 
Sponsored Links
Thanks. Make sense.

Did have a query about the Pantry floor. I was told it was quarry tiled floor and should not put plywood on top for lino as it would sweat. It does seem a bit damp as possibility there is no ventilation in the pantry currently.

Is it desirable to expose this traditional tiled floor? Can it be improved somehow, polished or cleaned easily?

Or if the floor is not that level, is it better to put some self level compound on it and finish it off with some flooring?


1726531265533.png

1726531389523.png
 

Attachments

  • 1726531359914.png
    1726531359914.png
    712.5 KB · Views: 22
Hey, really appreciate some feedback as dunno what to do and have to sort floor out this weekend before plumber bloke comes,,, :oops:

Tried cleaning the quarry tiles up, but they still look a bit naff and make the space look dingy...

1728772868923.png


Sounds like throwing down some self levelling compound will provide a platform for some nice olde' tiles instead.

1728772919197.png


Bit worried about damp stuff, so if I put down a damp proof membrane I should be covered in case there isn't one?

Do I have paint on something like this on the tiles and give it time to dry?

1728773314659.png


Or could I just put this down and then plop the self level compound down on top of it?

1728773121706.png


Really welcome any feedback as have to do something quickly before plumba comes(!!)
 
Kept the previous floor as quarry tiles. Think its the right shout, so thanks.


Did rip out the old garage WC and put some pipe plumbing in...

WC before and after.jpg


Connector with boss into an elbow, into an offset and then 110mm pipe through the wall...

1736563871044.png


Waste Connects to the WC on the other side and into the pan waste...

IMG_20250107_151431_DRO.jpg

IMG_20250107_151413_DRO (1).jpg


But the garage waste piping is not sitting completely level to the floor...

IMG_20250108_152136_DRO.jpg


And slight lift on the front of the connector into the ground...


IMG_20250108_152104_DRO.jpg
IMG_20250108_152104_DRO2.jpg


Anyone think this gap with the connector not being flush with the floor is a big issue? - and should I do something different for this piping?

Don't want any future leaks or smells in this area as there will be a new raised floor in this area and a shower ontop of this elbow waste piping.

Worried about all these concealed connection points under a future floor, but I don't think I have any other solution.

Are there any piping options I am missing which would be a better idea? Or is there anything I can put where the connector is not flush with the floor (silicone?) to sure things up supposing there was a blockage and waste would back track?
 
Last edited:
Sponsored Links
I'd redo it if I'm honest with you. Use a double socket bend, with a short section of 110mm between that and the Drain connector, lift the bend slightly higher, and run 110mm through from the bend to the back of the pan on a shallower fall, then lose that pan connector into the elbow! Bit of silicone lubricant on the Drain Connector fins might help you ease them into the drain slightly more.

With a bit of adjustment you should find the whole lot lines up as you want it to, the reason the Drain Connector isn't vertical is as it's under stress from somewhere, probably the angle of the pipe coming through the wall. Once all lined up, I'd perhaps be inclined to haunch some fine concrete around the base of the Drain Connector to ensure it cannot move at a later date. Fitted properly, it shouldn't ever leak.
Thanks for info. Yes, could find a double socket elbow - or maybe cut down a connector...

1736677569039.png


Yes, it looks likes it needs to be higher up to be lined up as the 110mm fall is pushing the elbow backwards. A question of finding the impingement place - maybe its the hole in the wall just needs to be bigger, the hole in the skirting board, or the connector into the WC on the other side is getting in the way. The question I have for the experts are on the choices:

-Are these 110mm offset to be avoided or they have decent seals on them? - is just better to have less connections?
1736679270530.png


-Are these flexi type WC pan connectors okay - or should they be avoided as the crinkles impeded flow and generally have more chances of leaks?...

1736678401536.png


The floor in garage will be raised to make it flush with the pantry floor - but raising the waste connection does mean the later shower above it - has to go on a larger plinth, but so be it.
 
https://www.screwfix.com/p/floplast-push-fit-92-5-double-socket-bend-black-110mm/68796 Pipework coming off the Pan only needs a 1:40 fall, (25mm per metre), so I'd get a level off the pan of the pan, as to where it needs to go through the wall, and adjust the hole to suit. This will thin give you distance between bend and Drain Connector, cut vertical section pf pipework to suit.

Less joints in any pipework run, the better. Every joint is one more potential leak.

Flexi pan connectors are best avoided. They are weaker than rigid versions, and being translucent, risk attracting rats, particularly in ground floor installations, as the Vermin see the light coming through and quickly realise there isn't much between them and a way out the drain.
 
Quick update...

Put a flexi thing into the pan instead...

1736810153060.png


That seemed to make it easier to get the drain connector and elbow in a better position (I think)....

1736810124181.png


Maybe can chip a bit more of the bottom hole part, however the drain connector is pretty flat at the moment - with some silicone around the drain connector or concrete (as previously suggested), I think it would be fine. Totally levelling up the elbow will mean less of a fall in the 110mm pipe which is probably advantageous to have.

Am wondering:

1. If the WC flexi pan connector is too crunched up and I should adjust this with a smaller one or shorter pipe it goes into. No idea if these crinkle up connectors are okay over time?

2. If that white offset on the black elbow is good for life - or likely to leak in the years ahead?

There will be a raised floor above the elbow waste connectors with a shower plinth - so no easy way to go back to it in the future - hence anything I can do to ensure its maintenance leak free and future proofed now whilst I have access?
 
Sorry but you've pretty much made it worse by including a flexi.

Judging by the last picture you've way more fall on that pipe than you need, if you had less fall you'd be able to get all the pipework inline alot better and lose that offset joint aswell.
 
You need to get rid of that pan connector joint, its wrong, unnecessary, and risks causing a pinch point where it'll block. The only place the Pan connector is needed is on the outlet from the Pan, hence the name.

Get the soil pipe set to the right fall, (the Bends are actually 92.5º to give you 2.5º to provide a suitable fall.) Pipe from WC straight into Bend, section of pipe out of the bend into the Drain Connector.
 
Thanks for input, am keen to understand them as not sure what they mean.

Do bear in mind that there is also a correction the offset is doing in this plane of view...

1736900360655.png


hence wondering if the offset had to stay, do they seal maintenance free?
 
The pictures look like you can remove more of the wall to remove the need for the offset connector.

Get yourself a 90 degree pan connector, fit it to the toilet with the outlet horizontal. That will then attach to the white 110mm pipe you've already got, remove whatever wall is stopping it going through the hole.

Once that's through the wall you'll need a double socket connector like the white one mentioned earlier in the thread that will allow you to raise the black bend to meet the white 110mm pipe.

If the angle between the white 110mm and black bend is out take a picture and we'll advise on how to make it up with the right fittings.
 
It's a mess, but if it isn't leaking leave it alone.
 

DIYnot Local

Staff member

If you need to find a tradesperson to get your job done, please try our local search below, or if you are doing it yourself you can find suppliers local to you.

Select the supplier or trade you require, enter your location to begin your search.


Are you a trade or supplier? You can create your listing free at DIYnot Local

 
Sponsored Links
Back
Top